How to set up feature flags in Flutter
Mar 05, 2024
Feature flags help you conditionally roll out and release features safely. This tutorial shows you how integrate them into your Flutter app using PostHog.
We'll create a basic Flutter app, add PostHog, create a feature flag, and then implement the flag to control content in our app.
1. Create a new Flutter app
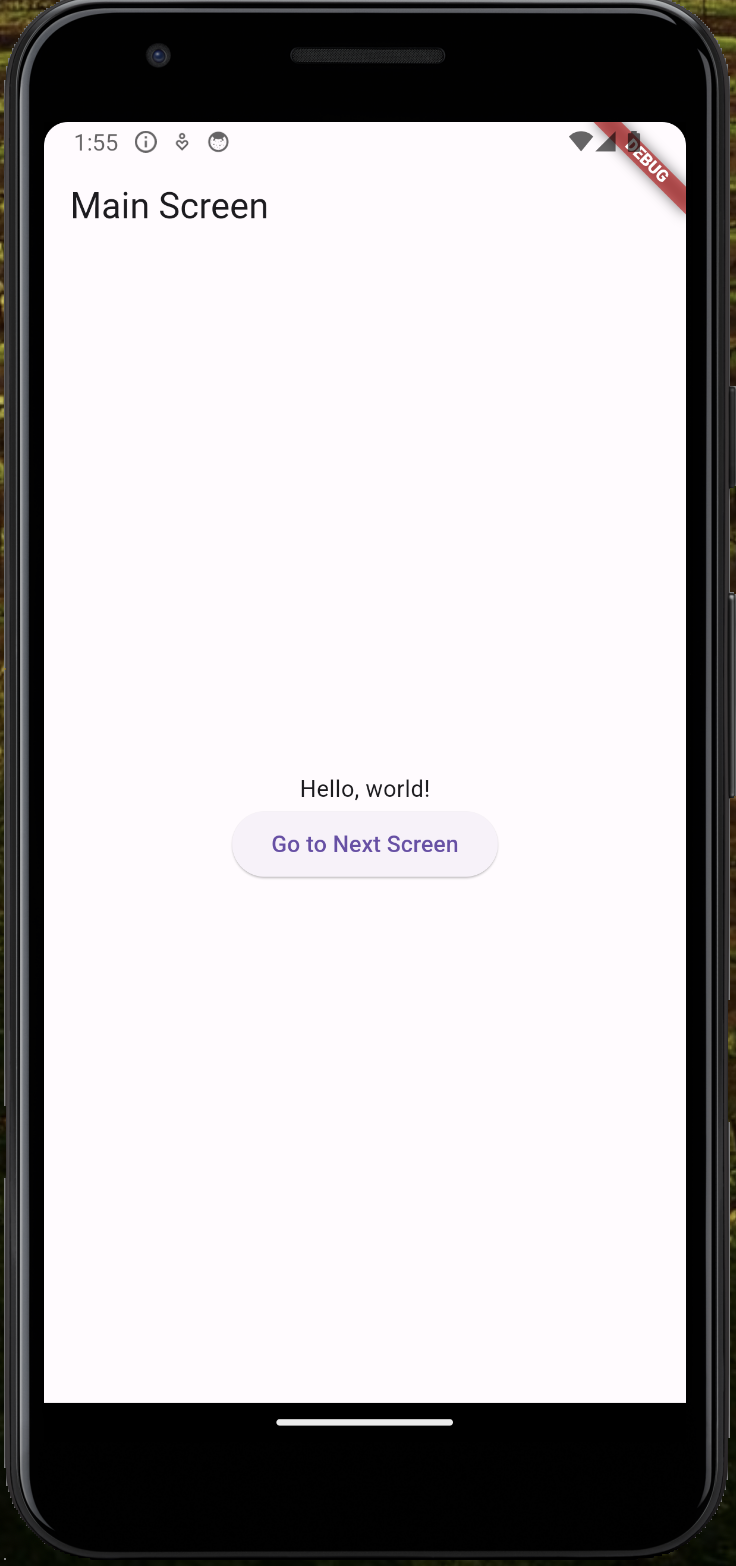
Our app will have two screens:
- The first screen will have a button which takes you to a second screen.
- The second screen will either have a
red
orgreen
background color, depending on whether our feature flag is enabled or not.
To set this up, first ensure the Flutter extension for VS Code is installed. Then, create a new app by opening the Command Palette in VS Code (Ctrl/Cmd + Shift + P
), typing flutter
and selecting Flutter: New Project
.
Select Empty Application
and name your app flutter_feature_flags
. Then, replace your code in lib/main.dart
with the following:
import 'package:flutter/material.dart';import 'feature_screen_view.dart';void main() {runApp(const MyApp());}class MyApp extends StatelessWidget {const MyApp({super.key});Widget build(BuildContext context) {return const MaterialApp(title: 'Flutter Feature Flags App',home: MainScreen(),);}}class MainScreen extends StatelessWidget {const MainScreen({super.key});Widget build(BuildContext context) {return Scaffold(appBar: AppBar(title: const Text('Main Screen')),body: Center(child: Column(mainAxisAlignment: MainAxisAlignment.center,children: <Widget>[const Text('Hello, world!'),ElevatedButton(child: const Text('Go to Next Screen'),onPressed: () {Navigator.push(context,MaterialPageRoute(builder: (context) => const FeatureScreenView(isFlagEnabled: false)), // We update this later);},),],),),);}}
Lastly, in the lib
directory, create a new file for our second screen called feature_screen_view.dart
. Add the following code to it:
import 'package:flutter/material.dart';class FeatureScreenView extends StatelessWidget {final bool isFlagEnabled;const FeatureScreenView({Key? key, required this.isFlagEnabled}) : super(key: key);Widget build(BuildContext context) {return Scaffold(backgroundColor: isFlagEnabled ? Colors.green : Colors.red,);}}
Press F5 and run the app in any emulator (we chose Android) to see your app in action.
2. Add PostHog to your app
With our app set up, it’s time to install and set up PostHog. If you don't have a PostHog instance, you can sign up for free.
To start, install PostHog’s Flutter SDK by adding posthog_flutter
to your pubspec.yaml
:
# rest of your codedependencies:flutter:sdk: flutterposthog_flutter: ^4.0.1# rest of your code
Next, we configure PostHog in each platform using our project API key and instance address. You can find these in your project settings.
Android setup
For Android, add your PostHog configuration to your AndroidManifest.xml
file located in the android/app/src/main
:
<manifest xmlns:android="http://schemas.android.com/apk/res/android" package="your.package.name"><application><!-- ... other configuration ... --><meta-data android:name="com.posthog.posthog.API_KEY" android:value="<ph_project_api_key>" /><meta-data android:name="com.posthog.posthog.POSTHOG_HOST" android:value="https://us.i.posthog.com" /> <!-- usually 'https://us.i.posthog.com' or 'https://eu.i.posthog.com' --><meta-data android:name="com.posthog.posthog.TRACK_APPLICATION_LIFECYCLE_EVENTS" android:value="true" /><meta-data android:name="com.posthog.posthog.DEBUG" android:value="true" /></application></manifest>
You'll also need to update the minimum Android SDK version to 21
in android/app/build.gradle
:
// rest of your configdefaultConfig {minSdkVersion 21// rest of your config}// rest of your config
iOS setup
For iOS, you need to have Cocoapods installed. Then add your PostHog configuration to the Info.plist
file located in the ios/Runner
directory:
<?xml version="1.0" encoding="UTF-8"?><!DOCTYPE plist PUBLIC "-//Apple//DTD PLIST 1.0//EN" "http://www.apple.com/DTDs/PropertyList-1.0.dtd"><plist version="1.0"><dict><!-- rest of your configuration --><key>com.posthog.posthog.API_KEY</key><string><ph_project_api_key></string><key>com.posthog.posthog.POSTHOG_HOST</key><string>https://us.i.posthog.com</string> <!-- https://us.i.posthog.com or https://eu.i.posthog.com --><key>com.posthog.posthog.CAPTURE_APPLICATION_LIFECYCLE_EVENTS</key><true/><key>com.posthog.posthog.DEBUG</key><true/></dict></plist>
Then you need to set the minimum platform version to iOS 13.0 in your Podfile:
platform :ios, '13.0'# rest of your config
Web setup
For Web, add your Web snippet
(which you can find in your project settings) in the <head>
of your web/index.html
file:
<!DOCTYPE html><html><head><!-- ... other head elements ... --><script>!function(t,e){var o,n,p,r;e.__SV||(window.posthog=e,e._i=[],e.init=function(i,s,a){function g(t,e){var o=e.split(".");2==o.length&&(t=t[o[0]],e=o[1]),t[e]=function(){t.push([e].concat(Array.prototype.slice.call(arguments,0)))}}(p=t.createElement("script")).type="text/javascript",p.crossOrigin="anonymous",p.async=!0,p.src=s.api_host+"/static/array.js",(r=t.getElementsByTagName("script")[0]).parentNode.insertBefore(p,r);var u=e;for(void 0!==a?u=e[a]=[]:a="posthog",u.people=u.people||[],u.toString=function(t){var e="posthog";return"posthog"!==a&&(e+="."+a),t||(e+=" (stub)"),e},u.people.toString=function(){return u.toString(1)+".people (stub)"},o="capture identify alias people.set people.set_once set_config register register_once unregister opt_out_capturing has_opted_out_capturing opt_in_capturing reset isFeatureEnabled onFeatureFlags getFeatureFlag getFeatureFlagPayload reloadFeatureFlags group updateEarlyAccessFeatureEnrollment getEarlyAccessFeatures getActiveMatchingSurveys getSurveys getNextSurveyStep onSessionId".split(" "),n=0;n<o.length;n++)g(u,o[n]);e._i.push([i,s,a])},e.__SV=1)}(document,window.posthog||[]);posthog.init('<ph_project_api_key>',{api_host:'https://us.i.posthog.com',})</script></head><!-- ... other elements ... --></html>
3. Create a feature flag in PostHog
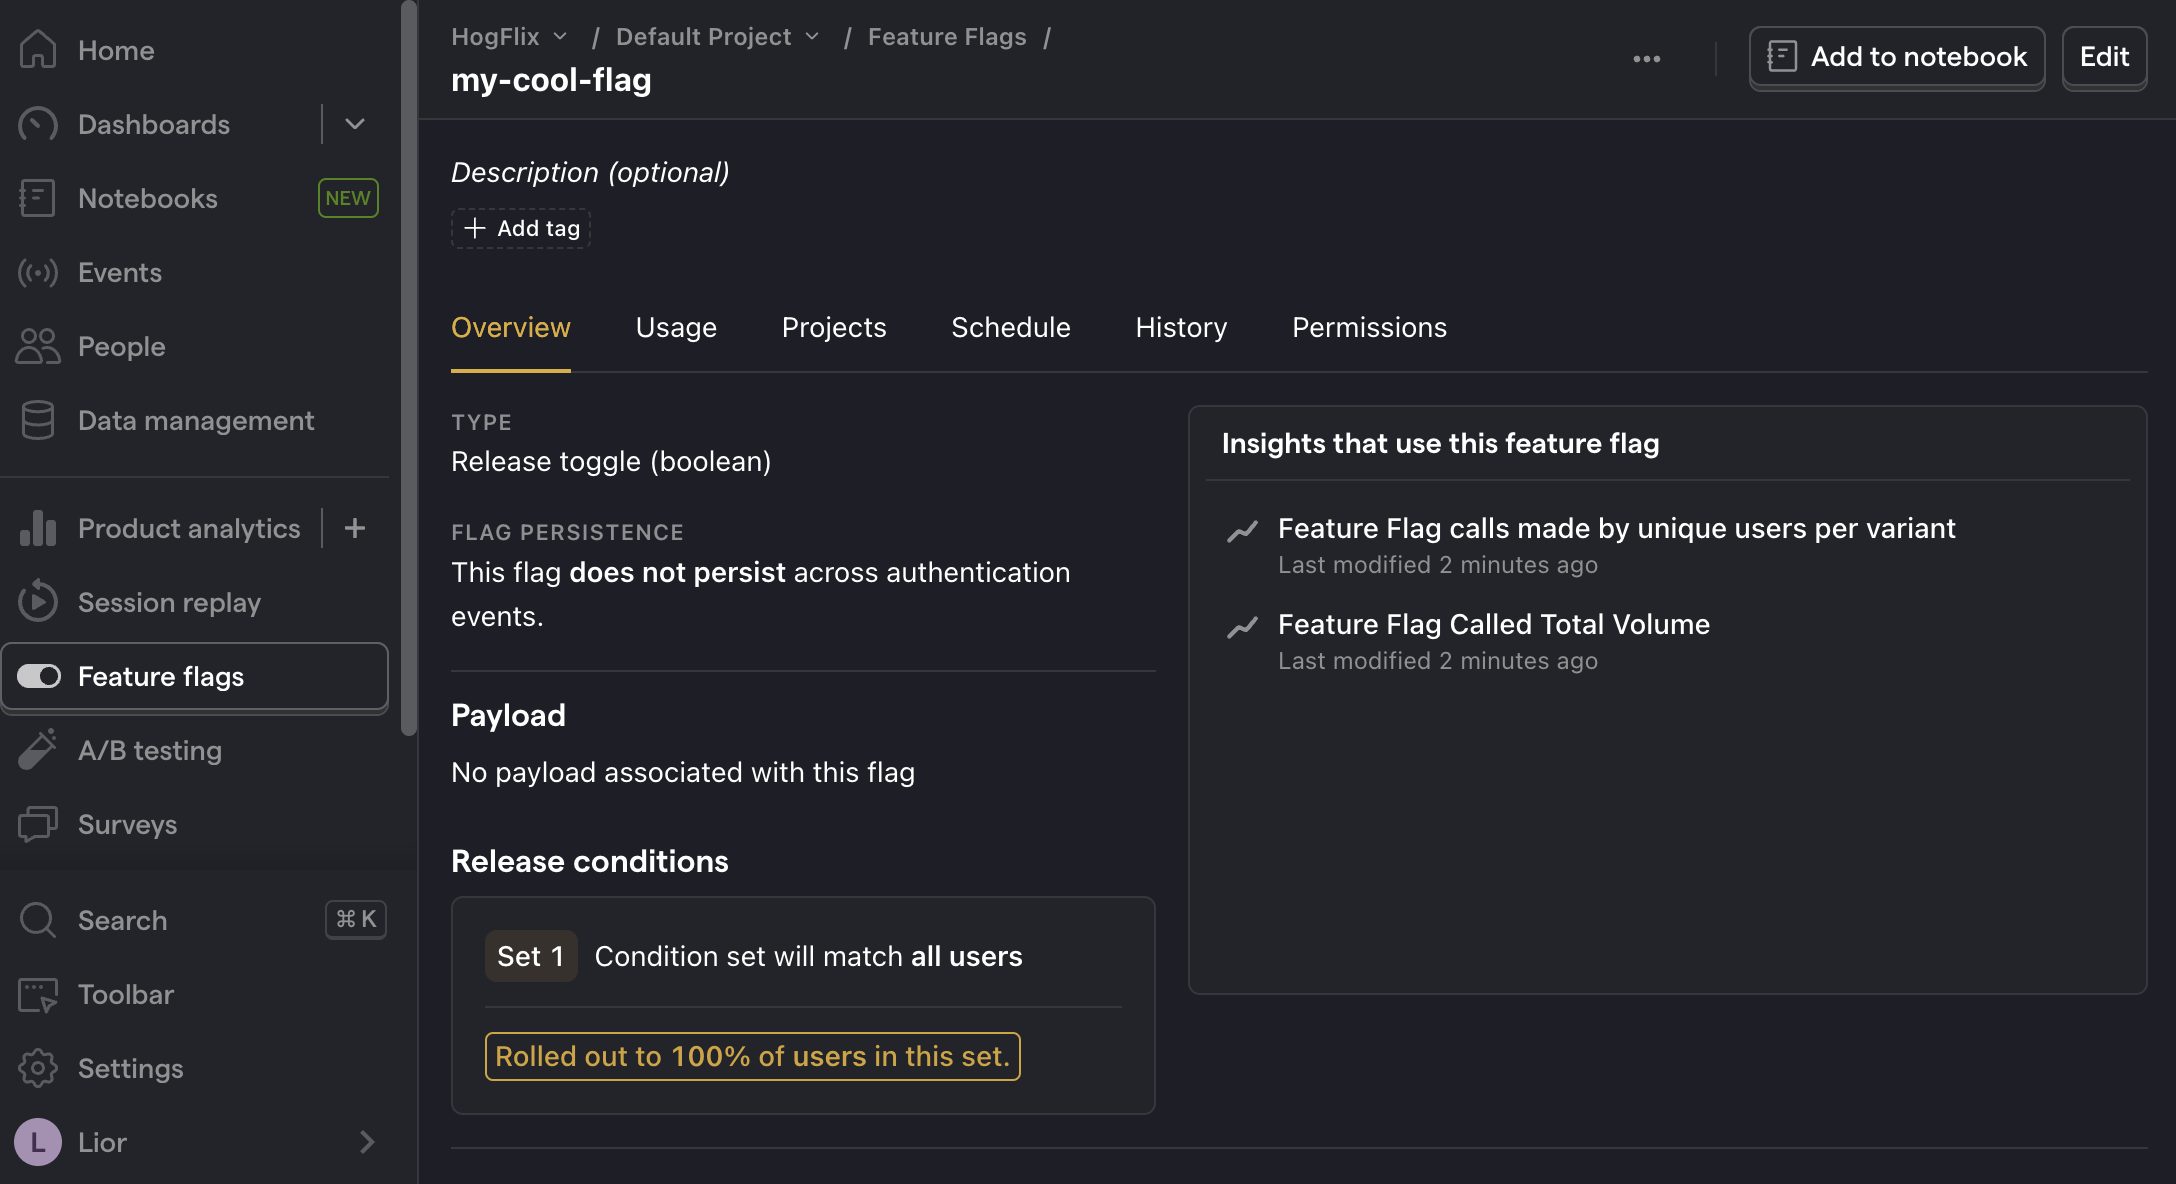
With PostHog set up, your app is ready for feature flags. To create one, go to the feature flags tab in PostHog and click New feature flag. Enter a flag key (like my-cool-flag
), set the release condition to roll out to 100% of users, and press "Save."
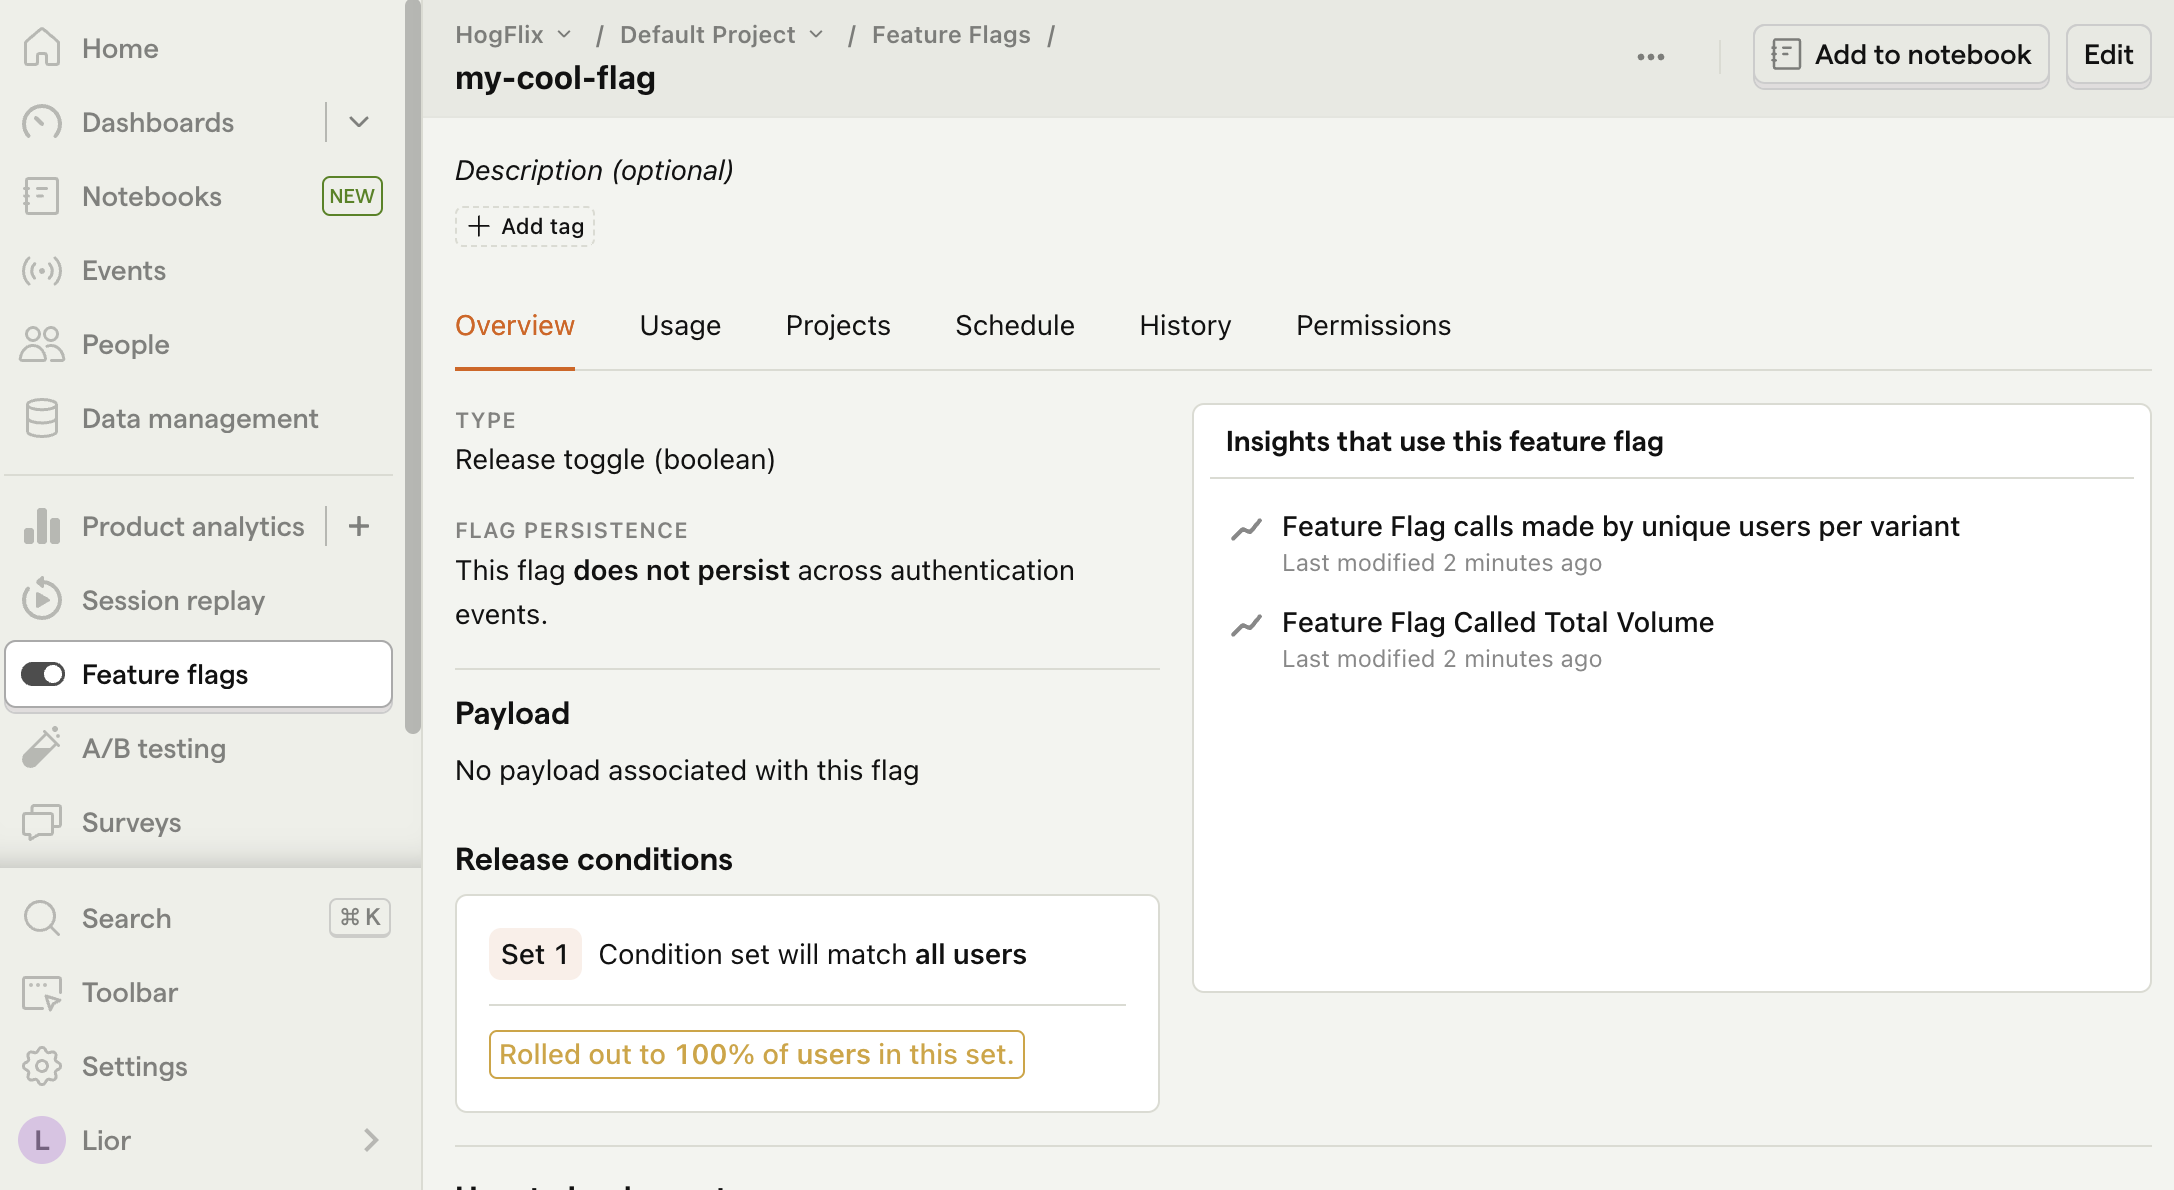
You can customize your release conditions with rollout percentages, and user or group properties to fit your needs.
4. Implement the flag code
To implement the feature flag, we:
- Fetch the
my-cool-flag
flag usingawait Posthog().isFeatureEnabled('my-cool-flag')
. - Change the background color of
FeatureScreenView
based on the value of the flag.
To do this, update the code in main.dart
to the following:
import 'package:flutter/material.dart';import 'feature_screen_view.dart';import 'package:posthog_flutter/posthog_flutter.dart';void main() {runApp(const MyApp());}class MyApp extends StatelessWidget {const MyApp({super.key});Widget build(BuildContext context) {return const MaterialApp(title: 'Flutter Feature Flags App',home: MainScreen(),);}}class MainScreen extends StatelessWidget {const MainScreen({super.key});Widget build(BuildContext context) {return Scaffold(appBar: AppBar(title: const Text('Main Screen')),body: Center(child: Column(mainAxisAlignment: MainAxisAlignment.center,children: <Widget>[const Text('Hello, world!'),ElevatedButton(child: const Text('Go to Next Screen'),onPressed: () async {bool isFlagEnabled = await Posthog().isFeatureEnabled('my-cool-flag');if (context.mounted) {Navigator.push(context,MaterialPageRoute(builder: (context) => FeatureScreenView(isFlagEnabled: isFlagEnabled)),);}}),],),),);}}
That's it! When you restart your app and click the button, you should see the green background color on the second screen.
Further reading
- A software engineer's guide to A/B testing
- How to run A/B tests in Flutter
- How to set up analytics in Flutter
Subscribe to our newsletter
Product for Engineers
Read by 25,000+ founders and builders.
We'll share your email with Substack
Questions? Ask Max AI.
It's easier than reading through 552 docs articles.